
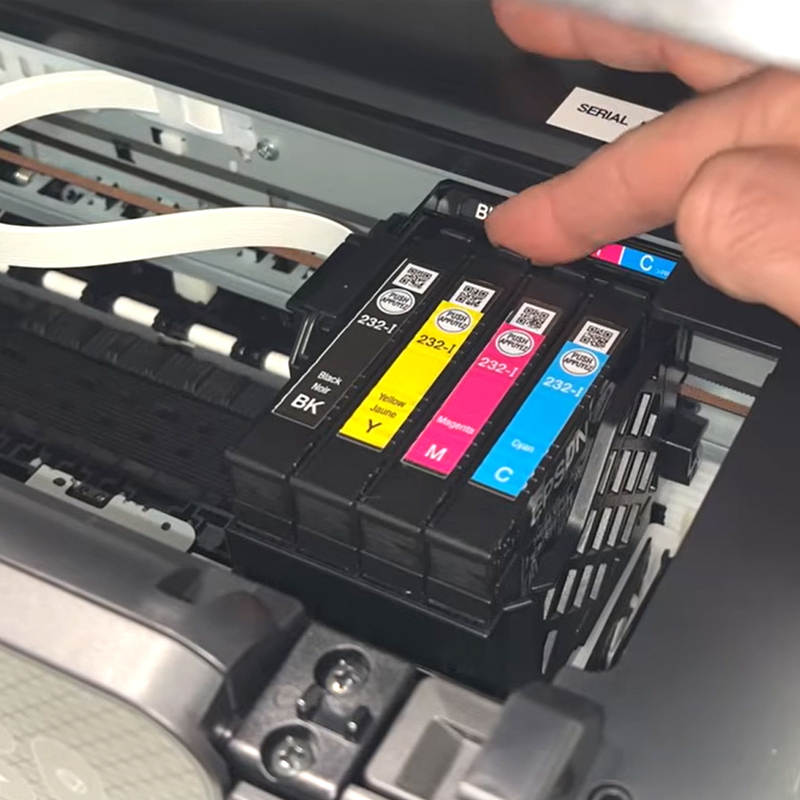
 How to Change Ink in an Epson Printer
How to Change Ink in an Epson Printer
Changing ink should be a quick, tidy job once the printer type is clear. This guide shows how to replace ink cartridges in Epson printer models and how to refill Epson EcoTank tanks safely. It starts with a fast check to confirm which ink system the printer uses, then covers the cleanest replacement steps and what to do if the printer still shows an error. It also covers UK disposal options for used cartridges and bottles, plus a way to match the correct replacement before ordering.
Which Epson ink system does the printer use?
Confirm whether the printer uses cartridges or an EcoTank refill system before opening anything. The supplies you handle and the most common mistakes are different. If the printer has an LCD, use its ink or maintenance menu as the prompt to follow.
Quick ways to tell from the printer and supplies
- Cartridge printers use small plastic cartridges and a cartridge carriage inside the printer. Epson’s general cartridge replacement workflow is outlined in Epson cartridge replacement guidance.
- EcoTank printers have visible ink tanks and use ink bottles. Epson’s user guides typically list the steps under Refilling the Ink Tanks.
What changes between cartridges and EcoTank refills
With cartridges, the main risk is poor seating, a protective strip left on, or interrupting the printer during ink charging. With EcoTank refills, the main risks are filling the wrong-coloured tank, overfilling, or leaving caps open.
If you have a four-pack of small cartridges labelled by colour, follow the cartridge route. If you have ink bottles and the printer has tanks with coloured caps, follow the EcoTank refill route.
Getting the ink system right first prevents most replacement errors. Next, set up a clean workspace and the few items that make the swap easier.
What should be prepared before changing ink?
Prepare first, then open the printer. Most mess and frustration come from hunting for a tissue, scissors, or the correct colour mid-way through the process.
A good baseline checklist is:
- A few sheets of kitchen roll (for any drips)
- A small bin bag for packaging
- The correct replacement ink (kept sealed until needed)
- Clean, dry hands (avoid touching ink ports or contacts)
- Enough time for the printer to finish its replacement routine
Epson’s cartridge handling guidance emphasizes careful handling and avoidance of contact with internal components. In a shared space, place a kitchen roll down first and keep the new cartridge sealed until the printer is ready. This reduces the chance of a half-open cartridge drying out or being knocked.
A two-minute setup saves a restart later. If your Epson uses cartridges, start replacement from the printer prompts and follow the steps below.
How can ink cartridges be replaced on Epson printers?
Most Epson cartridge printers follow the same pattern: start from the printer prompt, wait for the carriage to move into position, replace the indicated cartridge, then let the printer complete its ink charging routine. For model-agnostic steps straight from Epson, use its cartridge replacement guidance as a reference point. Epson cartridge replacement guidance
- Turn the printer on and wait until it is idle.
- Start replacement from the printer menu (or follow the on-screen “replace ink” prompt). This usually moves the cartridge carriage into position.
- Open the cover as instructed by the printer and avoid touching internal parts.
- Remove the indicated cartridge (the screen often tells you which colour).
- Unpack the new cartridge only when ready. Remove any protective tape or seals as directed, but avoid touching ink ports or electrical contacts.
- Insert the new cartridge firmly until it clicks into place.
- Confirm on the printer to begin any ink charging or priming cycle. Do not switch off during this process.
If your model uses an ink light to signal replacement, Epson manuals often include a “light on or flashing” pathway. Epson ink light replacement guidance
Practical example: The printer shows “Replace Black”, but you bought a multipack. Replace only the colour the printer requests, confirm it clicks into place, then let the printer finish charging before printing again.
Closing line: The most reliable cartridge change is the one the printer guides you through step by step.
Transition line: If your Epson has refillable tanks instead, use the EcoTank refill steps next.
For replacement options by colour and multipack, see Ink cartridges.
How can Epson EcoTank ink be refilled?
EcoTank refilling is simple, but accuracy matters: match the colour, fill neatly to the indicated line, and close everything properly. Epson’s refilling steps are usually listed in the printer’s user guide. Epson EcoTank refilling steps
- Check the tank levels and identify which colour needs topping up.
- Open the ink tank cover and then the cap for the correct colour tank.
- Match the bottle colour to the tank colour before opening the bottle.
- Fill slowly to the line (avoid overfilling). Keep the bottle upright and wipe any drips.
- Close the tank cap firmly and shut the cover.
- Reset the ink level if prompted on the printer’s screen.
Practical example: The black tank is below the lower line before a week of printing. Place kitchen roll under the tank area, refill black only to the upper line, close the cap, then follow any on-screen reset prompt so the ink monitor stays accurate.
Closing line: Slow, colour-matched filling prevents spills and sensor confusion.
Transition line: If the printer still throws an error after refilling or replacement, use the quick checks below.
If you need compatible supplies for refill models, start with Epson ink bottles.
Why does the printer still show an error after changing ink?
Most post-change errors come down to seating, packaging, or a mismatch between the printer and the cartridge type. Start with the easiest checks first, then move to the more specific ones.
Common symptoms and quick checks:
- “Cartridge not recognised”: remove and re-seat the cartridge until it clicks, then retry replacement from the menu.
- Ink light stays on or keeps flashing: confirm the correct colour was replaced and the printer completed its charging cycle.
- New cartridge shows as empty: check for protective strips or packaging parts left in place.
- EcoTank level doesn’t change: follow the printer’s prompts to reset the ink level, where available.
Epson’s recognition troubleshooting guidance focuses on identifying the unrecognised cartridge and checking fit and related issues. Epson recognition troubleshooting
Practical example: You replace cyan, but the printer still warns about cyan. Remove the cartridge, check for any remaining protective film, re-seat it firmly, and run the replacement flow again from the printer menu rather than power-cycling repeatedly.
Closing line: Treat the printer’s prompt as the instruction, and re-seat before replacing again.
Transition line: Once the printer accepts the ink, the next step is making sure future replacements match the exact model and code.
If something still doesn’t look right, use Contact Us for help with identifying the correct ink code.
How can the right replacement ink be identified before buying?
The safest match is always printer model → ink code → colour(s) needed. This avoids ordering a cartridge that looks right but is not the correct fit for that specific Epson series.
Quick ways to confirm:
- Check the printer model label (often on the back or underside).
- Look at the old cartridge label for the code and colour.
- Use the printer menu or driver software to confirm which colour is low.
Epson’s guidance on ink cartridge codes highlights that consumables can vary by model and region, so it is worth matching using UK-appropriate information. Epson ink cartridge codes
Practical example: A cartridge reads “604 Black” on the label. Match the printer model first, confirm that code is correct, then decide whether you need just black or a multipack.
Closing line: Matching by code is the quickest way to avoid returns.
Transition line: After replacement, the final step is disposing of used cartridges and bottles responsibly.
To match in minutes, use the cartridge finder. For broader options, browse Affordable Printer Ink and Toner Cartridges.
How should used Epson cartridges and bottles be disposed of in the UK?
Used cartridges and ink bottles are not always accepted in kerbside recycling, so it helps to check a recognised scheme or local recycling point. A practical baseline is to store empties cleanly and dry until you can drop them off.
UK-friendly options include:
- National guidance on where printer cartridges can be recycled. Recycle Now printer cartridges
- Regional guidance where kerbside collection is limited. Zero Waste Scotland cartridges guidance
- Keep cartridges in their packaging (or a sealed bag) to prevent leaks during storage.
Practical example: Keep used cartridges in a zip bag in a drawer, then drop them at a suitable recycling point when doing a larger recycling run.
Closing line: Safe storage plus a recognised recycling route is usually the simplest approach.
Transition line: To wrap up, here’s a short summary of the cleanest way to change ink and avoid repeat errors.
Conclusion
Changing Epson ink goes smoothly when the printer type is confirmed first. Cartridge models guide replacement on-screen, so priorities are seating the cartridge firmly and letting the printer finish its charging cycle. EcoTank refills rely on careful colour matching, filling to the line, and closing caps properly. If an error remains, re-seat the cartridge, check for leftover packaging, and run the replacement flow again from the printer menu rather than guessing. Once the printer accepts the change, print a test page to confirm colours. For a fast match when buying replacements, use the cartridge finder to match your Epson model.
FAQs
Do Epson printers need to be on to change ink?
Many cartridge models need power so the printer can move the cartridge carriage into position. If the printer shows a replace-ink prompt, follow that flow and avoid switching off mid-cycle.
Can ink be replaced before it is empty?
Yes. It can help before a busy week, but it may leave usable ink in the old cartridge. Replace only the colour the printer requests and keep the remaining cartridges sealed until needed.
Why does the ink light keep flashing after replacement?
It often means the printer has not completed its replacement routine or the cartridge is not seated correctly. Re-seat the cartridge until it clicks, then run the replacement flow again from the menu.
What is the difference between standard and XL cartridges?
XL usually means a higher-yield cartridge designed to print more pages than the standard version. The better choice depends on print volume and whether frequent replacements are a hassle.
How can EcoTank ink levels be reset after refilling?
Many EcoTank models prompt you to reset ink levels after topping up. If no prompt appears, check the maintenance or ink settings menu for an ink level reset option.
What should be done if ink gets on skin or in eyes?
Wash skin with soap and water. If ink gets in your eyes, rinse carefully with clean water and seek medical advice if irritation continues. For model-specific cautions, check the printer’s user guide.
